
Quickstart - Running a HumanLayer Task
This tutorial teaches you how to create and run one small task in HumanLayer. You will use the macOS app and Claude Code.
At the end, Claude Code will add one Markdown file to a repository. You will see the task and its session in HumanLayer.
Before you start
You need:
- macOS and a HumanLayer account.
- Claude Code installed and signed in.
- Git.
You can use a Git repository that you already have. The task adds one file to the repository, so use a clean test branch.
If you do not have a repository ready, the tutorial shows how to clone the Effect repository.
This tutorial uses the local macOS app. For Linux, Windows, or another host, use the remote daemons guide.
This tutorial uses Claude Code. To use Codex, complete the Codex setup guide before you create a task.
1. Download and install HumanLayer
Download the latest HumanLayer app for a Mac with Apple silicon.
Open the downloaded file. Then move HumanLayer to your Applications folder and open it.
Alternate path: Homebrew
You can install the app with Homebrew instead.
brew trust --tap humanlayer/humanlayer
brew install --cask humanlayer/humanlayer/humanlayer
open /Applications/HumanLayer.app
The app opens after the last command.
2. Sign in
The app opens your browser for sign-in. Complete the sign-in flow. Then return to HumanLayer.
You will see the HumanLayer session view after sign-in. The local daemon starts with the app.
3. Choose a test repository and start a task
Choose one option:
- Use a Git repository that you already have. Open it in a terminal and check that it has no changes that you need to keep.
- Clone the Effect repository for this tutorial:
mkdir -p ~/tmp \
  && git clone https://github.com/effect-ts/effect.git ~/tmp/effect \
  && cd ~/tmp/effect
Keep the terminal open. You will use the repository to check the task result.
Select Create Task. The task form opens.
In Directory, select your existing repository or the effect clone. Keep INLINE selected under Issue Source.
Paste this text into the task description:
Create a file named humanlayer-first-task.md in the repository root.
Add a heading named First HumanLayer task.
Add one sentence that says HumanLayer ran this task.
Do not change other files.
HumanLayer creates a value in Name and a matching value in Slug. You can keep both values.
4. Choose one session path
Use these settings:
- Under Workflow, select ONESHOT.
- Under Worktree(s), select NEVER.
- Under Coding Agent, select Claude Code.
- Keep the default model and effort.
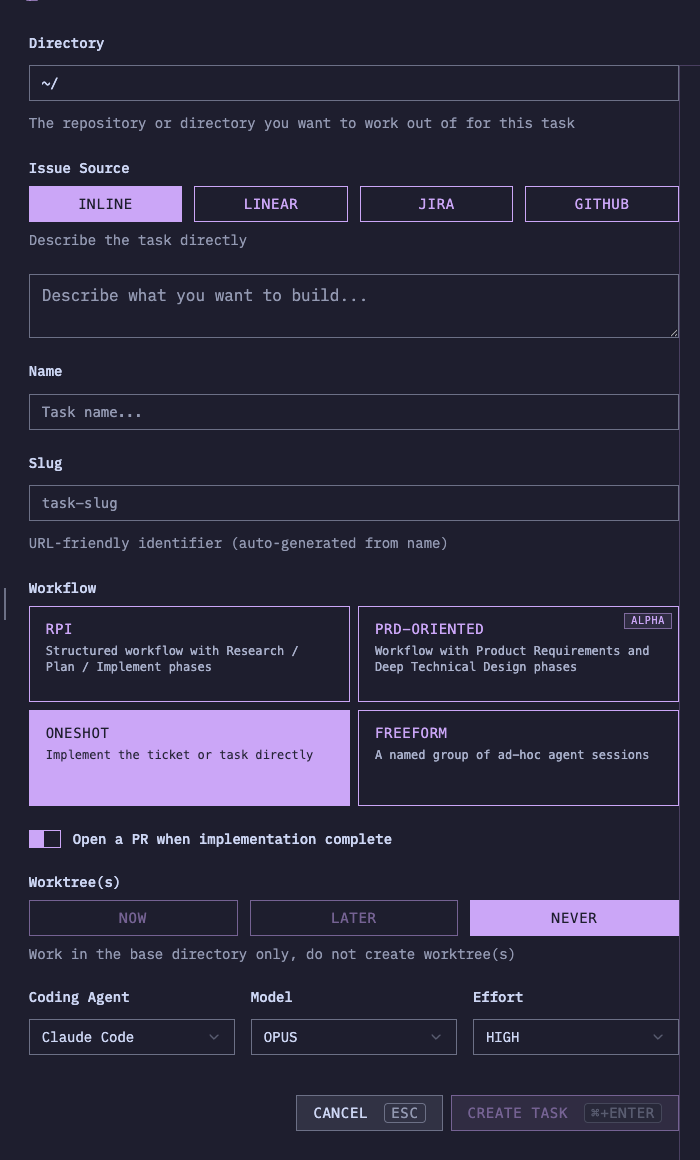
The Never setting runs the task in the selected repository. This is why you must use a clean test branch.
If you need isolated worktrees or multiple repositories, stop this tutorial. Use the workspace setup guide.
5. Create the task
Select Create Task.
HumanLayer shows Setting up task while it creates the task and starts the session. Keep the page open until setup finishes.
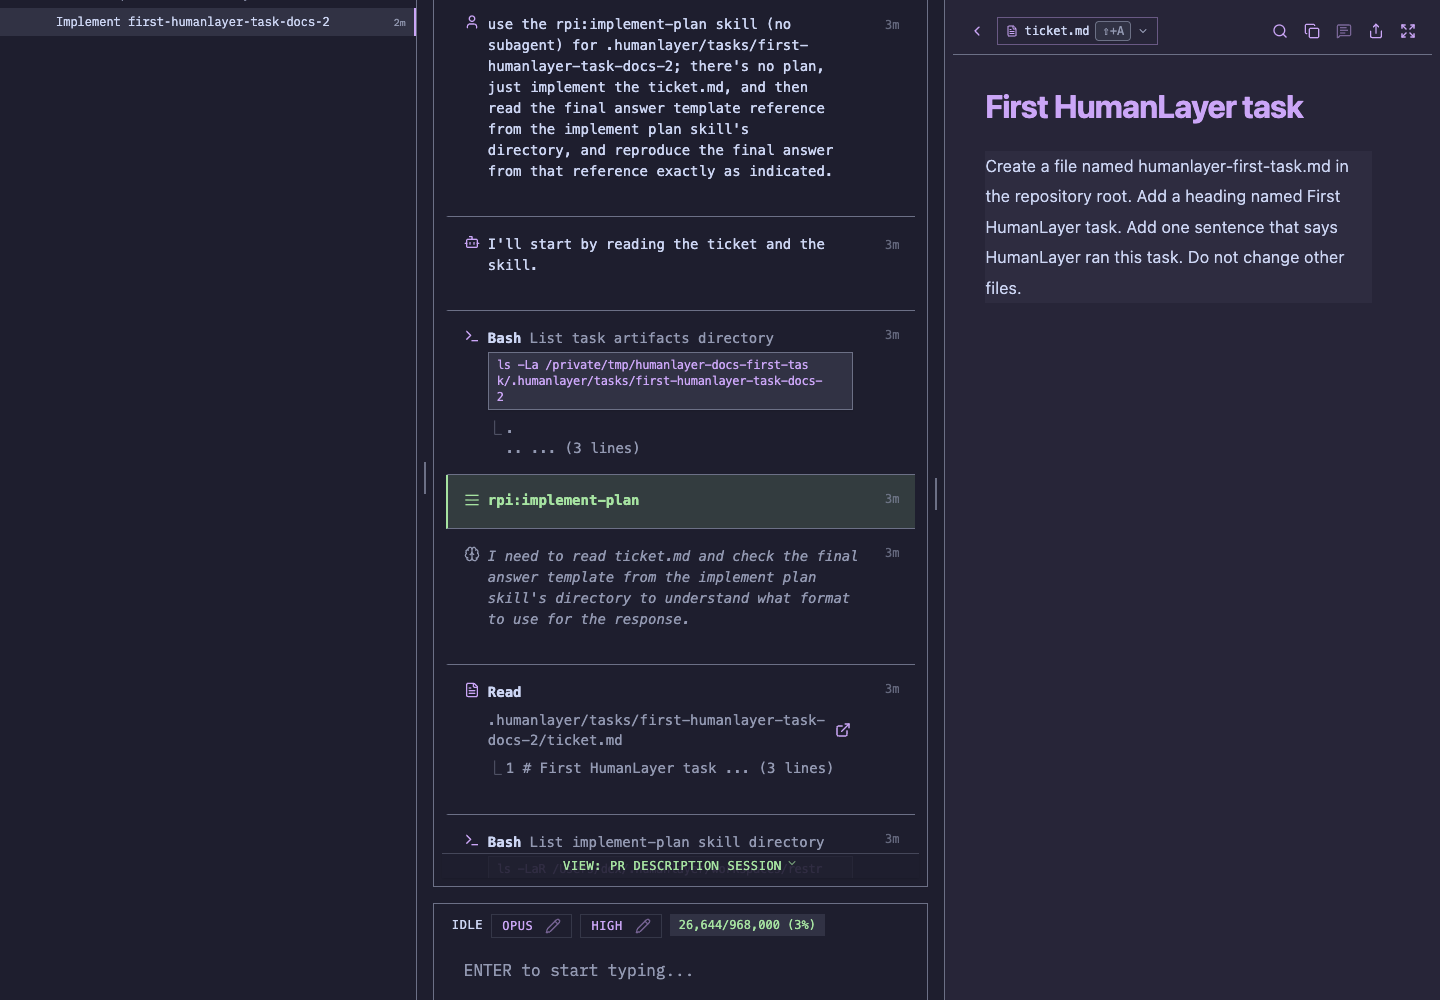
The task page opens after setup. The session starts with your task description. You can watch Claude Code work in the HumanLayer UI.
6. Check the result
Wait for the session to finish. Then open humanlayer-first-task.md in the repository root.
On the task page, click the session row to open its chat thread.
The file must contain:
# First HumanLayer task

HumanLayer ran this task.
Review the repository diff. The task must not change other files.
What you learned
You selected a repository, described a task, chose a workflow, and ran a Claude Code session. You also checked the result in the repository.
Next, use the skills and workflows guide to choose a workflow for a real task.